
This chapter provides step-by-step procedure for Drupal installation. Before installing Drupal, the following system requirements are necessary.
System Requirements for Drupal
Database − MySQL 5.1 +
Web Server −
WAMP (Windows)
LAMP (Linux)
XAMP (Multi-platform)
MAMP (Macintosh)
Nginx
Microsoft IIS
Operating System − Cross-platform
Browser Support − IE (Internet Explorer 8+), Firefox, Google Chrome, Safari, Opera
SSL (Secure Socket Layer) − A valid security certificate is required for HTTPS
PHP Compatibility − PHP 5.2+
Download Drupal
Step 1 − Download the Drupal and copy to your web server from this link − https://www.drupal.org/project/drupal
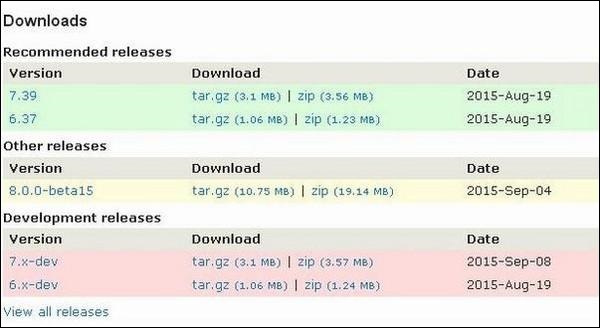
Step 2 − Select the latest version of zip file which you want to download as shown in the following screen. The Recommended releases are the latest stable releases of either version.
Setup Wizard
It's very easy to setup Drupal on your system. The following steps describe how to setup Drupal locally on your system.
Step 1 − Download the zip file and extract it to your local computer. Rename the folder from its current name to any name of your choice to refer to your site.
Step 2 − Drupal requires MySQL database. Create a new empty database with user/password for Drupal to use. (For e.g., user as "root" and password as "root" or else you can set as per your choice).
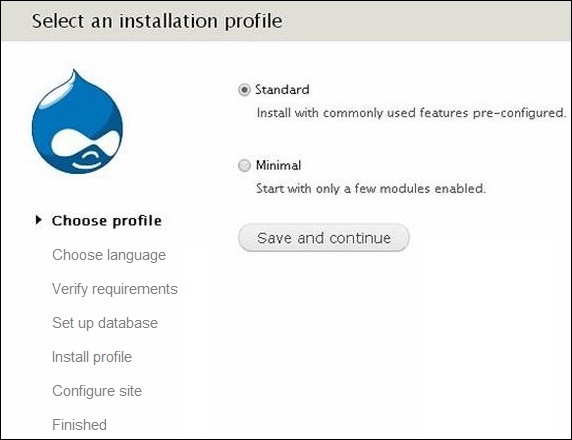
Step 3 − Open your browser and navigate to your Drupal file path, you will see the first Drupal installer screen as shown in the following image. In our case the path is localhost/< Your_drupal_folder >. Select the Standard option and click Save and continue.
Step 4 − Select the default language for Drupal website.
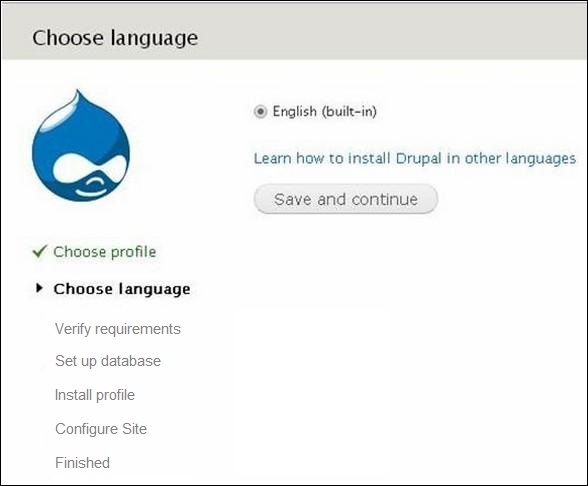
After selecting the language, click Save and continue.
Step 5 − Go to Database configuration page. You need to enter the type of database you will be using, and other details as follows.
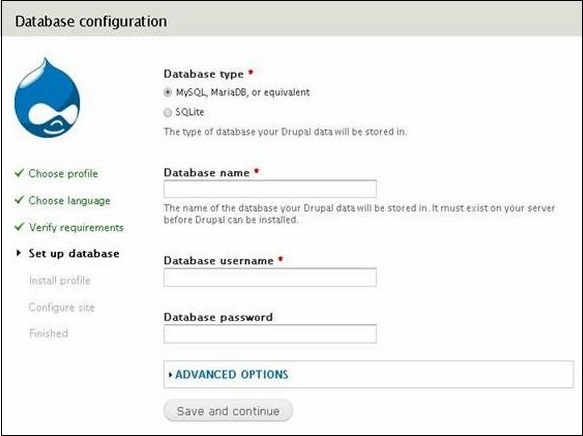
Database Type − Select the database type. By default, it will be MySQL.
Database name − Enter the database name for Drupal.
Database username − Enter the user name of your MySQL database.
Database password − Enter the password which you had set for MySQL Database.
When you click the ADVANCED OPTIONS, you will see the following screen −
.jpg)
You can fill the advanced options for the database −
Database Host − Enter the host name where your database is located.
Database port − Enter the database port.
Table Prefix − It is used to add prefix in the database tables, which helps to run multiple sites on the same database.
After filling all the information, click the Save and continue button.
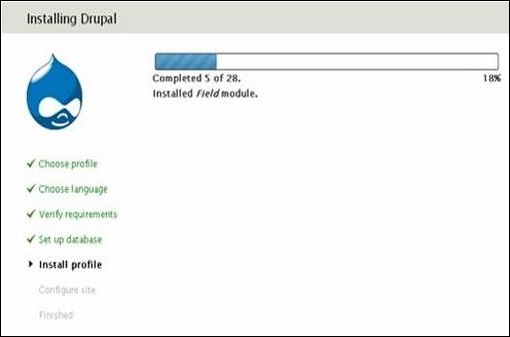
Step 6 − The installation process starts on your machine.
Step 7 − The Configure site page appears on the screen −
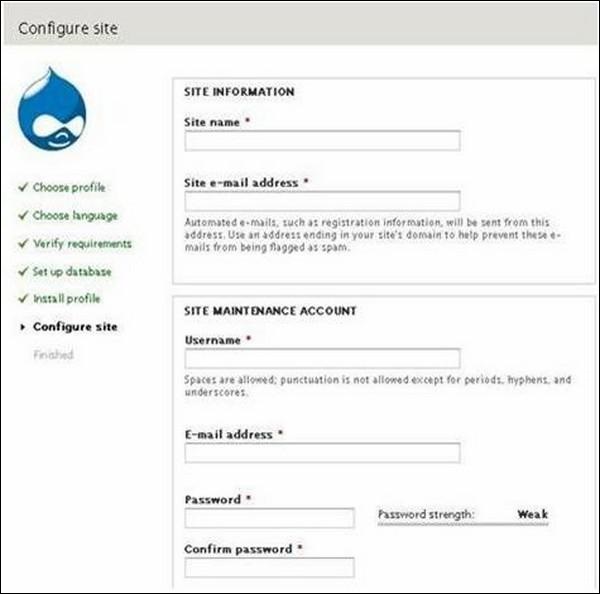
It contains the following fields −
Site name − The name that you want to give to your site.
Site e-mail address − The e-mail address to which automated e-mails will be sent.
Username, Email-address and Password − These are all administrative details used for the maintenance account.
You need to enter all these fields and click Save and continue.
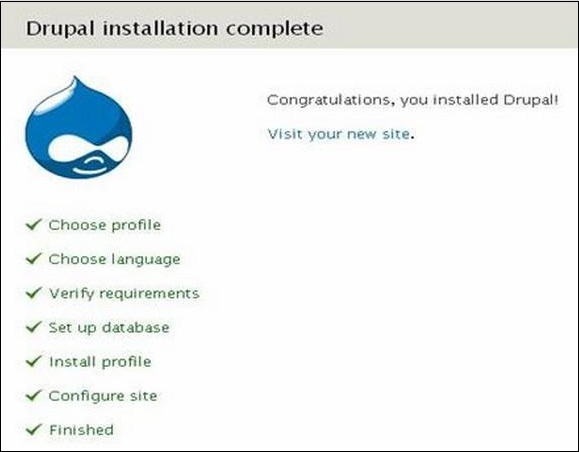
Step 8 − The following page indicating that your Drupal installation is successful will appear on your screen.
Step 9 − Click the Visit your new site link as shown in this image.
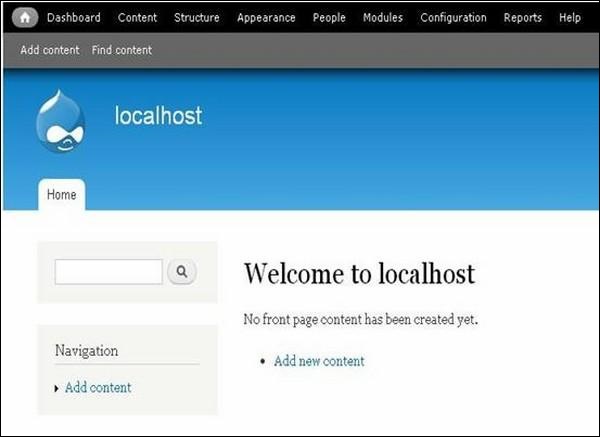
Step 10 − Finally, the newly installed Drupal homepage appears on your screen as seen in the preceding image.

0 Comments